Durkin's Blog

Top 5 Mistakes to Avoid When Installing a Pergola

No comments

With the global pergolas market projected to grow at a compound annual growth rate (CAGR) of 5.90% between 2023 and 2030, it’s clear that pergolas are becoming an increasingly popular addition to homes worldwide. However, to ensure a safe and durable structure, avoiding common mistakes is essential. 


Here are the top five mistakes to avoid when installing a pergola in Connecticut, along with actionable tips to ensure a successful project.


Table of Contents

Key Takeaways

Choosing a Trusted Pergola Supplier

Top 5 Mistakes to Avoid When Installing a Pergola

  1. Overlooking Proper Site Preparation
  2. Ignoring a Solid Foundation and Footing
  3. Choosing the Wrong Materials
  4. Skimping on Support and Bracing
  5. Forgetting About Long-Term Maintenance

Personalizing and Upgrading Your Pergola After Installation

Frequently Asked Questions

Transform Your Outdoor Space with Durkin’s in Connecticut!

Key Takeaways

  • Failure to level the ground, account for drainage, or check for underground utilities can lead to instability. Proper site preparation is crucial. 
  • Using inadequate foundations can compromise its safety and durability. A strong foundation tailored to the site and material ensures stability. 
  • Selecting materials unsuitable for the environment can lead to frequent repairs. Choose materials that are compatible with the property’s climate.
  • Insufficient support, poorly spaced beams, or lack of cross-bracing can make the pergola unsafe and unstable. Proper bracing and reinforced components are essential.
  • Neglecting regular cleaning, inspections, and protective treatments can shorten the pergola’s lifespan. Routine upkeep preserves the structure.


Choosing a Trusted Pergola Supplier


Before starting with pergola installation, selecting the right supplier in Connecticut is crucial. The supplier’s expertise and the quality of their materials can make or break the entire project. This decision becomes even more significant when the pergola is meant to enhance the property’s value in the real estate market.


What to Look for in a Pergola Supplier

1. Product Variety

A trusted supplier should offer a range of materials, including wood, metal, and vinyl. This allows homeowners to choose the best option for their needs and budget. A wide selection also ensures the pergola matches the property’s overall design, which can further increase its appeal.

2. Reputation

Reviews and testimonials are valuable tools for assessing a supplier’s reliability. A reputable company will have a strong track record of delivering high-quality products. Consistently positive feedback indicates that the supplier meets customer expectations and delivers on promises.

3. Customer Support

Excellent customer service ensures that any issues, whether related to delivery or installation, are promptly addressed. A responsive support team can also provide valuable advice during the decision-making process, helping homeowners make informed choices.

4. Warranties

Offering warranties indicates the supplier’s confidence in their products and provides homeowners with peace of mind. A good warranty ensures that any unforeseen issues, such as material defects, are addressed without additional costs.

5. Delivery and Installation Services

Some suppliers offer delivery and installation as part of their services, which can simplify the process for homeowners. Working with a supplier who handles both material supply and installation ensures the project is completed efficiently and accurately.

6. Customization Options

Look for suppliers who provide customization to meet unique needs and preferences. A customized pergola can be tailored to fit specific dimensions, styles, or functional requirements, creating a one-of-a-kind feature for the property.
 

Top 5 Mistakes to Avoid When Installing a Pergola

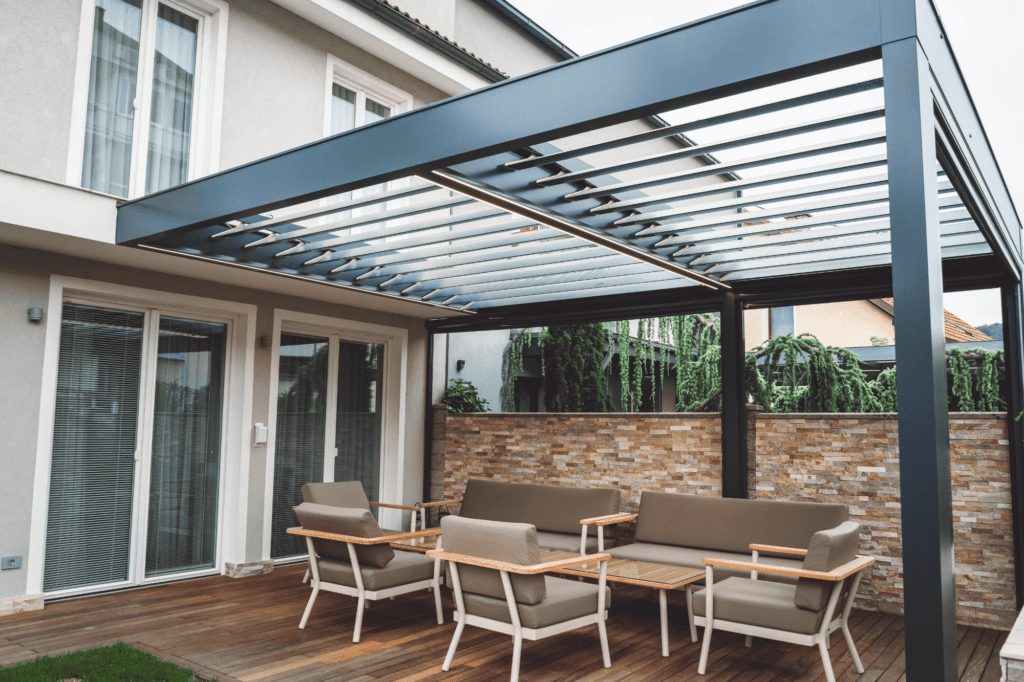
As interest in outdoor living spaces continues to increase, proper pergola installation becomes more crucial than ever. Understanding the key factors in successful pergola installation can help homeowners make informed decisions and enhance their property value. Avoiding common mistakes is also essential to ensure the structure remains safe, durable, and visually appealing.


1. Overlooking Proper Site Preparation

The installation site dictates the stability and functionality of a pergola. Many homeowners underestimate the importance of site preparation, which can lead to challenges that could have been avoided. Proper site preparation ensures that the pergola stands securely and integrates seamlessly into the property’s landscape.


Key steps for site reparation include:

Assess the Terrain

  • Level the Ground to Prevent Structural Imbalances: Uneven terrain can cause the pergola to lean or shift over time, which compromises its stability and visual appeal. Leveling the ground provides a firm foundation, ensuring the structure remains upright and aligned for years to come.
  • Avoid Areas Prone to Erosion or Flooding: Locations with poor drainage or frequent water runoff can erode the soil beneath the pergola, weakening its base. Selecting a site with firm, well-draining soil helps prevent long-term damage and reduces the need for costly repairs.

Consider Sun and Wind

  • Install the Pergola in the Right Location: For example, a pergola designed for shade should be placed where it can block the sun during peak hours, such as over a seating or dining area. This placement not only enhances comfort but also maximizes the structure’s functionality.
  • Add Extra Anchoring: Strong winds can strain a poorly anchored pergola, causing it to wobble or even collapse. Positioning the pergola in a sheltered area or reinforcing it with wind-resistant brackets helps ensure its stability in adverse weather conditions.

Check Utility and Zoning

  • Verify the Location of Underground Utilities: Accidentally damaging gas lines, water pipes, or electrical cables can result in safety hazards and costly repairs. Contacting local utility companies to mark underground lines is a simple yet critical step that prevents such issues.
  • Obtain Building Permits: Failing to secure necessary permits can lead to fines or the need to dismantle the pergola entirely. Checking regulations ensures the project meets safety standards and avoids potential disputes with neighbors or authorities.


2. Ignoring a Solid Foundation and Footing

A strong foundation is the backbone of a durable pergola. Unfortunately, homeowners often underestimate the importance of footings, often leading to instability and potential damage. A solid foundation ensures the pergola remains safe, functional, and visually appealing for years, even in challenging weather conditions.


Here are ways to ensure a strong foundation: 

Select the Right Foundation Type

  • Concrete Footings for Permanent Installations: Concrete provides a stable and durable base that resists shifting over time. This makes it the best choice for heavy or long-lasting pergolas, especially in areas prone to soil movement or extreme weather.
  • Gravel or Compacted Soil for Temporary Installations: While easier to install, these types of foundations are less stable and may need extra reinforcement, such as ground stakes or anchoring plates, to ensure the pergola remains secure.

Anchor Properly

  • Use Ground Anchors or Bolts: Anchors help hold the pergola firmly in place, preventing movement caused by wind or heavy use. Properly installed anchors also enhance the pergola’s ability to support additional features like hanging lights or plants.
  • Match the Anchoring Method to the Type of Material: Different materials, such as wood, metal, or vinyl, require specific types of anchors to maintain stability. For instance, metal structures may need rust-resistant bolts, while wooden pergolas benefit from reinforced brackets.

Account for Load Capacity

  • Consider Additional Features: Items such as climbing plants, lights, or fans can bear additional load. Pergolas often serve as a base for decorative or functional elements, which add weight to the structure. 
  • Don’t Overload: Overloading a pergola with unsupported weight can lead to collapses, which poses a risk to users and surrounding property.


3. Choosing the Wrong Materials

Material selection impacts the longevity, maintenance needs, and overall aesthetic of a pergola. Choosing materials that do not suit the environment or intended use can result in frequent repairs, increased costs, or even structural failure. The right material not only ensures durability but also enhances the pergola’s overall value and appeal.


Common pergola materials include: 

Wood

  • Advantages: Wood pergolas blend seamlessly with outdoor spaces, and provide a timeless appeal that can complement traditional or rustic home designs. Customization options, such as staining or carving, allow homeowners to create unique designs that reflect their style.
  • Drawbacks: Prone to rot, pests, and weather damage, wood requires regular maintenance. Without proper sealing and treatment, wooden pergolas can deteriorate quickly in humid or rainy climates. Regular upkeep, including staining, sealing, and pest control, is necessary to maintain their appearance and structural integrity.

Metal (e.g., Aluminum):

  • Advantages: Modern appearance, highly durable, and low maintenance. Metal pergolas offer a sleek, contemporary design that pairs well with minimalist architecture. Their durability makes them ideal for regions with extreme weather conditions, as they resist warping and bending better than wood.
  • Drawbacks: Metal can rust if not treated properly; higher upfront cost. While highly durable, untreated metal can corrode over time, particularly in coastal or high-humidity areas. Protective coatings and regular inspections are necessary to prevent rust, adding to the initial investment.

Vinyl

  • Advantages: Budget-friendly, resistant to weathering, and easy to maintain. Vinyl pergolas are a practical choice for homeowners seeking low-maintenance options. They resist fading, cracking, and weather damage, making them ideal for low-effort installations in moderate climates.
  • Drawbacks: Limited in style and may lack the durability of other options. While affordable, vinyl designs may not suit all architectural styles and can appear less refined compared to wood or metal. Additionally, they may not withstand heavy loads or extreme weather as effectively as other materials.

4. Skimping on Support and Bracing

Support and bracing are vital for a pergola’s stability. Neglecting these elements can result in a wobbly or unsafe structure that detracts from the outdoor space. Proper support and bracing ensure the pergola withstands both daily use and environmental stressors, making it a reliable and safe addition.


Best practices for support and bracing include: 

Strong Vertical Posts

  • Ensure Posts are Thick and Sturdy Enough: Thicker posts provide the strength needed to handle the pergola’s weight, especially when additional features like hanging plants or lighting are added. Using substandard posts increases the risk of instability, particularly in areas with heavy rainfall or snow.
  • Use Treated Wood or Metal: Treated wood resists rot and insect damage, while metal posts offer unmatched durability and modern aesthetics. These materials also have the structural integrity needed to support larger or customized pergola designs.

Reinforced Beams

  • Ensure Well-aligned and Properly Spaced Beams: Proper alignment of horizontal beams ensures even weight distribution across the structure, reducing stress points that could lead to sagging or failure. Careful spacing also prevents the beams from shifting or bowing under pressure.
  • Reinforce Long Spans to Prevent Sagging: Long pergolas often require additional supports or brackets to keep the beams level over time. Without reinforcement, sagging beams can compromise the pergola’s appearance and its structural integrity.

Cross Bracing

  • Add Diagonal Bracing: Diagonal braces create a triangular framework that adds rigidity, helping the pergola withstand gusty conditions. This feature is particularly important for freestanding pergolas or those installed in open, windy areas.
  • Implement Cross Bracing: By minimizing movement, cross bracing increases the safety and durability of the pergola, ensuring it remains functional and secure for years.


5. Forgetting About Long-Term Maintenance

Even the best-installed pergolas require maintenance to retain their functionality and visual appeal. Neglecting maintenance can lead to deterioration, which reduces the pergola’s lifespan and its contribution to the property’s real estate value. Consistent care not only preserves the structure but also maintains its aesthetic charm over time.


Best maintenance tips include: 

Routine Cleaning

  • Use Mild Soap and Water: Regular cleaning prevents buildup that could stain or damage the pergola’s surface, maintaining its original beauty. Use a soft brush or cloth to gently scrub hard-to-reach areas and ensure every corner stays spotless.
  • Inspect for Mold or Mildew: Mold and mildew can quickly degrade materials, particularly wood and vinyl, if not addressed promptly. Treating affected areas with appropriate cleaners prevents further growth and keeps the pergola safe for use.

Inspection and Repair

  • Check for Cracks, Loose Fasteners, or Other Signs of Wear: Routine inspections help identify small issues before they become major problems, ensuring the pergola remains stable and secure. Regular checks also protect users from potential hazards caused by weakened components.
  • Replace Damaged Components Promptly: Delaying repairs can exacerbate damage and potentially affect the entire structure. Timely replacements not only restore the pergola’s functionality but also prevent costly overhauls in the future.

Adding Protective Treatments

  • Apply Sealants or Stains for Wood Structures: Protective coatings shield wood pergolas from moisture, UV rays, and pests, significantly extending its lifespan. Choose a high-quality product that matches the pergola’s finish for optimal results and lasting protection.

Use Rust-resistant Coatings for Metal Structures: Applying rust-resistant paints or treatments prevents corrosion, particularly in humid or coastal regions. Regular maintenance of the coating ensures the metal maintains its strength and polished appearance.

Personalizing and Upgrading Your Pergola After Installation

Once the pergola is installed, customization options can turn it into a unique focal point of the property. Thoughtful personalization not only enhances the visual appeal but also maximizes the pergola’s functionality. 

Lighting Options

  • Add String Lights, Lanterns, or LED Strips: Lighting transforms the pergola into an inviting space for evening gatherings or quiet nights. Solar-powered options can be a cost-effective and eco-friendly choice for maintaining a well-lit area.
  • Highlight Specific Areas with Spotlights: Use focused lighting to draw attention to key features, such as climbing plants or outdoor furniture, to create a dynamic and layered visual effect.

Furniture and Décor

  • Use Weather-resistant Sofas and Cushions: Comfortable seating turns the pergola into a relaxing lounge area, perfect for entertaining guests or enjoying a quiet afternoon. Opt for fade-resistant fabrics to ensure longevity in outdoor settings.
  • Add an Outdoor Rug: Rugs not only add warmth and style but also protect the flooring beneath the pergola. Choose patterns and colors that complement the overall aesthetic of the outdoor area.

Seasonal Updates

  • Decorate the Pergola with Seasonal Items: Seasonal touches, such as garlands during the holidays or bright cushions in summer, keep the space feeling fresh and aligned with the changing ambiance of the year. Adding potted plants or seasonal flowers further enhances the natural beauty of the pergola.
  • Incorporate Accessories for Special Occasions: For events like Halloween, Christmas, or summer barbecues, themed décor can transform the pergola into a festive centerpiece that draws attention.


Frequently Asked Questions

What is the purpose of a pergola?

A pergola serves as an outdoor structure designed to provide partial shade while enhancing the visual appeal of a patio or garden. It creates a defined space for various activities such as dining, entertaining, or relaxing. Additionally, pergolas often support climbing plants, offering a natural canopy that blends with the outdoor environment.

How does a pergola differ from a gazebo?

Pergolas and gazebos differ in their design and functionality. Pergolas feature an open-roof design with beams or lattice, offering partial shade and an airy feel, while gazebos have a fully covered roof for complete shelter. Gazebos are better suited for areas needing full weather protection, whereas pergolas focus on aesthetics and light shade.

Can a pergola add value to a home?

Yes, a well-designed pergola can significantly boost a home’s value by enhancing its outdoor living space. It creates an inviting area for relaxation or entertainment, appealing to potential buyers. Pergolas are particularly attractive in real estate markets where outdoor features are in demand.


Transform Your Outdoor Space with Durkin’s in Connecticut!

Don’t want to risk making costly mistakes to your pergola installation? Trust the experts instead! Durkin’s is Connecticut’s go-to professional in pergola design and installation. With decades of experience, Durkin’s offers high-quality materials and expert craftsmanship tailored to your needs. Whether you’re looking to enhance your backyard’s functionality or boost your property’s curb appeal, Durkin’s is here to help.


Contact Durkin’s today to transform your outdoor space into a stunning, functional retreat!

MackAdminTop 5 Mistakes to Avoid When Installing a Pergola
read more

6 Weatherproof Features Trusted Tent Rentals Should Offer

No comments

Outdoor events require careful planning, especially when unpredictable weather conditions are a concern. Fortunately, trusted tent rentals provide essential features that protect attendees, equipment, and the overall experience from rain, wind, and harsh sun. By focusing on weatherproof designs, these tents ensure safety, durability, and comfort for any occasion. 

Here are six critical features that define reliable tent rentals in Connecticut and make them a top choice for seamless outdoor event planning.

Table of Contents

Key Takeaways

  1. Water-Tight Guttering Systems
  2. Durable, Weather-Resistant Fabrics
  3. WeatherShield Wall Attachment Systems
  4. Modular Construction for Enhanced Weatherproofing
  5. Versatile, Enclosed Sidewalls
  6. 100% Waterproof Tops

How to Design a Tent Layout for Optimal Weather Protection

How to Verify a Tent Setup for Weatherproofing on Event Day

Frequently Asked Questions (FAQs)

Choose Reliable Tent Rentals by Durkin’s for Any Occasion!

Key Takeaways

Seamless gutter attachments ensure efficient water flow and prevent leaks during rainy weather.

High-grade materials like coated polyester or vinyl provide durability and resistance to water, wind, and UV damage.

Heavy-duty zippers or Velcro strips create tight seals for sidewalls, blocking drafts and rain effectively.

Interlocking modular frames evenly distribute weight, enhancing stability in challenging weather conditions.

Removable sidewall panels offer adjustable protection and versatility for changing weather or event needs.

Waterproof tent tops with heat-sealed seams and treated coatings guarantee maximum protection from leaks.

Professional maintenance and regular inspections by trusted tent rentals ensure long-term weatherproof performance.


1. Water-Tight Guttering Systems

Reliable tent rentals should include water-tight guttering systems to handle unexpected rain. These systems prevent water from pooling around the tent, which keeps guests and equipment safe. Without proper drainage, tents risk leaks and flooding that can disrupt any event.

Why Water-Tight Guttering Systems Are Essential

  • Prevents Water Pooling Around the Tent: Pooling water can create muddy conditions, making walkways unsafe for guests. Effective guttering redirects water away from the tent to ensure dry, accessible paths.
  • Protects the Tent’s Interior from Leaks: Guttering systems catch and channel rainwater before it seeps into the tent. This keeps the event space dry and shields furniture and equipment.
  • Enhances Durability in Heavy Rain: A water-tight system prevents excessive water weight from damaging the tent’s fabric or structure. Proper drainage reduces stress on the tent, which also extends its lifespan.

How Trusted Tent Rentals Deliver Water-Tight Guttering Systems

  • Seamless Gutter Attachments: Trusted tent rentals include seamless gutter designs that securely attach to tent edges. These gutters ensure no gaps or leaks compromise water flow.
  • Integrated Downspouts for Water Management: Downspouts guide water away from the tent into designated drainage areas. This prevents water from accumulating at the base of the tent, which can pose hazards to guests. 
  • Customizable Gutter Systems: Trusted providers offer gutter systems that adapt to various tent layouts. Whether connecting multiple tents or enclosing a single space, the system adjusts for optimal functionality.


2. Durable, Weather-Resistant Fabrics

High-quality tent rentals should use fabrics that can withstand diverse weather conditions. Durable, weather-resistant materials ensure tents remain functional during rain, wind, and heat. This feature not only protects the structure but also keeps guests comfortable.

Why Durable, Weather-Resistant Fabrics Are Crucial

  • Provides Protection Against Rain and Moisture: Weather-resistant fabrics are designed to repel water, preventing leaks inside the tent. They maintain a dry and secure environment for guests and equipment.
  • Resists Tearing from Strong Winds: Tough materials reduce the risk of rips or punctures during gusty weather. This ensures the tent remains stable even in challenging conditions.=
  • Withstands Prolonged UV Exposure: Fabrics with UV-resistant properties minimize damage from prolonged sun exposure. This feature also prevents discoloration, which keeps the tent looking professional for many years. 

How Trusted Tent Rentals Deliver Weather-Resistant Fabrics

  • High-Grade Materials Built for Outdoor Use: Tent rentals often use coated polyester or vinyl fabrics that resist water and tearing. These materials are tested for outdoor durability to handle unexpected weather changes.
  • Reinforced Seams to Prevent Wear and Tear: Trusted providers offer tents with double-stitched or heat-sealed seams. This enhances the fabric’s ability to withstand heavy rain and wind.
  • UV-Coated Layers for Long-Term Durability: The fabrics used in tent rentals are often treated with UV coatings. These coatings protect the material from sun damage and help maintain its integrity over time.


3. WeatherShield Wall Attachment Systems

WeatherShield wall attachment systems create a secure barrier between the tent’s walls and roof. This attachment blocks wind and rain from seeping through gaps in the structure. Trusted tent rentals use these systems to keep the interior protected in all weather conditions.

Why WeatherShield Wall Attachment Systems Matter

  • Prevents Drafts and Rainwater Leaks: Attachment systems seal the walls tightly to the roof and ground. This barrier keeps cold drafts and rain from entering the tent’s interior.
  • Improves Structural Stability in Windy Conditions: WeatherShield systems ensure walls stay securely in place during strong winds. This prevents flapping or dislodging that could disrupt the event.
  • Enhances Guest Comfort: Sealed walls maintain a consistent interior environment by blocking out external elements. This feature is particularly important for temperature-sensitive events.

How Trusted Tent Rentals Deliver WeatherShield Wall Attachment Systems

  • Heavy-Duty Zippers and Velcro for Secure Sealing: Trusted tent rentals use robust zippers or Velcro strips to tightly attach walls to the tent’s frame. This ensures no gaps are left for wind or rain to penetrate.
  • Custom-Fit Walls for a Precise Installation: Wall panels, tailored as attachments to fit specific tent models, reduce the chance of weak points in the structure by ensuring a secure and precise fit.
  • Built-In Gaskets for Additional Weatherproofing: Some systems include rubber gaskets or seals at attachment points. These added layers improve resistance to water and wind by creating a tight, impenetrable barrier that prevents leaks and blocks drafts effectively.


4. Modular Construction for Enhanced Weatherproofing

Modular construction enhances the weatherproofing capabilities of tent rentals by providing flexibility and strength to withstand diverse conditions. This design ensures that tents remain secure and adaptable during challenging weather events. Trusted tent rentals use modular features to create durable and weather-resilient structures.

Why Modular Construction Enhances Weatherproofing

  • Prevents Weak Points in the Structure: Modular designs include interconnected frames that evenly distribute stress, reducing the likelihood of structural failure during heavy rain or wind. 
  • Allows Quick Adjustments for Weather Changes: Modular systems can be easily reinforced with additional supports or components, which improves the tent’s resistance to unexpected weather shifts. This adaptability helps mitigate risks from sudden storms.
  • Provides a Stable Foundation for Large Layouts: For complex or large tent configurations, modular designs ensure stability across all sections. This prevents uneven weight distribution that could compromise weatherproofing.

How Trusted Tent Rentals Use Modular Construction for Weatherproofing

  • Durable Materials for All Conditions: Modular frames crafted from aluminum or galvanized steel resist corrosion and maintain strength under wet or windy conditions. These materials ensure long-lasting weather resistance.
  • Secure Interlocking Mechanisms: Modular designs feature interlocking components that prevent shifting or gaps during extreme weather. These connections create a tight, cohesive structure.
  • Customizable Configurations for Weather Challenges: Modular systems allow tents to be resized or reconfigured to optimize protection against specific weather conditions. This flexibility ensures the structure meets the demands of any event.


5. Versatile, Enclosed Sidewalls

Enclosed sidewalls add versatility to tent rentals by providing extra protection from external elements. They shield against wind, rain, and cold while also offering privacy. Trusted tent rentals use enclosed sidewalls to create adaptable and secure spaces for any event.

Why Versatile, Enclosed Sidewalls Are Important

  • Blocks Wind and Rain for Added Comfort: Enclosed sidewalls create a physical barrier that keeps wind and rain out. This feature ensures guests remain dry and comfortable regardless of the weather.
  • Offers Privacy for Formal Events: Sidewalls can be used to create private spaces or conceal equipment and catering areas. This versatility is particularly useful for weddings or corporate events.
  • Regulates Interior Temperature: By enclosing the space, sidewalls help maintain a consistent temperature. This regulation is critical for events requiring heating or cooling systems.

How Trusted Tent Rentals Offer Versatile, Enclosed Sidewalls

  • Removable Panels for Adjustable Coverage: Trusted providers offer sidewalls that can be easily attached or removed. This allows event organizers to adapt to changing weather or event needs.
  • Transparent and Opaque Options for Customization: Sidewalls come in clear or opaque designs to suit different preferences. Clear panels provide visibility, while opaque ones enhance privacy.
  • Secure Attachments to Prevent Flapping: Enclosed sidewalls are fitted with secure fasteners to keep them in place. This ensures the walls don’t flap or detach in windy conditions.


6. 100% Waterproof Tops

A 100% waterproof top is a critical feature for tent rentals to protect guests and equipment during rain. This feature ensures that water doesn’t seep through, keeping the interior dry.

Why 100% Waterproof Tops Are Essential

  • Prevents Leaks and Dripping Inside the Tent: Waterproof tops create an impenetrable barrier against rain. This ensures the event space remains dry and functional all throughout. 
  • Reduces Damage to Equipment and Decorations: A completely waterproof top prevents water from reaching sensitive items. This is especially important for electronic equipment and delicate decorations.
  • Ensures Comfort for Guests: By blocking all moisture, waterproof tops create a dry, welcoming environment. This comfort is essential for maintaining a positive guest experience.

How Trusted Tent Rentals Deliver 100% Waterproof Tops

  • Seamless Fabric Construction: Trusted tent rentals use tops made from single-piece fabrics or heat-sealed panels. This ensures there are no seams in the tent for water to penetrate.
  • High-Grade Coatings: Waterproof tops are treated with coatings like polyurethane to enhance water resistance. These coatings ensure long-lasting protection even in heavy rain.
  • Periodic Maintenance for Continued Performance: Reputable providers inspect and maintain their waterproof tops regularly. This ensures that the materials remain effective and reliable over time.


How to Design a Tent Layout for Optimal Weather Protection

A well-planned tent layout is essential for ensuring comfort, safety, and functionality during an outdoor event, especially when dealing with unpredictable weather. By strategically organizing the space, trusted tent rentals can maximize protection from rain, wind, and sun. Below are six practical tips to help design a tent layout that offers superior weather protection:

1. Position Entrances Away from Prevailing Winds

The placement of entrances plays a critical role in weather protection, especially as outdoor events continue to grow in popularity. For instance, the percentage of wedding ceremonies held outdoors or partially outdoors rose from 57% in 2019 to 68% in 2020, reflecting a growing trend in outdoor celebrations. Setting up entry points on the side opposite prevailing winds reduces the risk of gusts blowing rain or debris into the tent.

2. Incorporate Drainage Areas Around the Tent Perimeter

Proper drainage prevents water from pooling around the tent. Adding designated drainage zones or slight slopes around the perimeter ensures rainwater flows away from the structure. Effective drainage also helps maintain dry paths for guests and protects the surrounding terrain from becoming muddy.

3. Use Modular Sections to Create Flexible Zones

Modular tent designs offer the ability to divide the space into zones that can adapt to changing weather conditions. For example, a larger event can benefit from separate dining, lounging, and storage areas within one tent. These sections make it easier to manage temperature control and ventilation in specific zones. Trusted tent rentals with modular options allow planners to adjust layouts based on the event’s needs and weather challenges.

4. Plan for Covered Walkways Between Multiple Tents

For larger events requiring multiple tents, covered walkways provide seamless protection from the elements. These walkways ensure guests can move between areas without exposure to rain or sun. This setup is ideal for weddings, festivals, or corporate events where a cohesive layout is key.

5. Create Designated Entrances for Equipment or Staff

Designating separate entrances for event staff and equipment ensures smooth operations without disrupting guest areas. These entrances can be positioned closer to catering zones, storage areas, or other back-of-house spaces to streamline logistics. Trusted tent rentals can help organizers plan layouts that balance guest experience and functionality, even under challenging weather conditions.

6. Utilize Sidewalls to Shield Key Areas

Strategically using sidewalls within the layout can offer additional protection for vulnerable areas, such as food stations, electronics, or seating zones. Trusted tent rentals provide sidewalls in various materials, including transparent or opaque options, to suit both practical and aesthetic needs.


How to Verify a Tent Setup for Weatherproofing on Event Day

The global tent rental service market experienced rapid expansion in 2023 and is projected to grow substantially by 2029. As part of this growth, inspecting a tent setup for weatherproofing has become crucial to ensure that guests, equipment, and the overall event are well-protected from the elements. 

By carefully checking key features, event planners in Connecticut can address potential issues before they become problems. Below are six essential steps to evaluate a tent rental’s weatherproofing capabilities: 

1. Examine the Integrity of the Tent Fabric

Inspect the tent fabric for any visible tears, punctures, or signs of wear that could compromise its weatherproofing. High-quality tent rentals use durable, weather-resistant fabrics designed to withstand rain, wind, and UV exposure. Check for proper coatings or treatments that repel water and ensure longevity. Addressing any damage before the event starts also helps avoid leaks or structural weakness.

2. Check the Tightness of Sidewall Attachments

Ensure that sidewalls are securely attached to the tent’s frame and properly sealed to prevent drafts or water leaks. Test the stability of the sidewalls by gently applying pressure to confirm they remain in place. Any loose or flapping sidewalls should be adjusted immediately.

3. Test the Water-Tight Guttering System

Inspect the guttering system to ensure it is properly installed and capable of redirecting rainwater away from the tent. Pour water along the gutters to verify that it flows correctly toward designated drainage areas. Clogged or improperly aligned gutters should be cleared or repositioned.

4. Verify the Strength of Anchoring Systems

Anchoring systems are essential for maintaining the tent’s stability in windy conditions. Check that stakes, sandbags, or water barrels are securely placed and evenly distributed around the tent. Reinforce any anchors that appear loose or insufficient to handle potential weather changes.

5. Assess the Fit of Modular Components

If the tent uses a modular design, ensure all sections are tightly connected and properly aligned. Misaligned frames or loose joints can weaken the structure and compromise weatherproofing. Trusted tent rentals with modular construction often include interlocking components for added security. Conduct a final check to ensure the tent is stable and free from gaps or uneven sections.

6. Inspect the Tent Top for Full Waterproofing

The tent top must be 100% waterproof to keep the interior dry during rain. Look for any sagging areas or seams that may collect water and create weak points. Testing with a light spray of water can help confirm the top’s ability to repel moisture effectively.


Frequently Asked Questions (FAQs)

Can weatherproof tent rentals handle snow or freezing temperatures?

Yes, many weatherproof tent rentals are designed to handle snow and freezing conditions. Tents equipped with reinforced frames and durable fabrics can withstand the weight of snow and prevent structural damage. Add-ons like insulated liners and portable heaters can maintain a comfortable interior temperature. Discuss these requirements with the rental provider to ensure the tent is suitable for cold-weather use.

Are there specific tent sizes better suited for extreme weather?

The size of the tent can impact its ability to withstand extreme weather conditions. Smaller tents often have better wind resistance due to less surface area exposed to gusts, while larger tents may require extra reinforcements. Modular designs allow larger tents to maintain stability by distributing weight evenly across the structure. It’s important to work with a trusted rental provider to select a tent size and design that matches the event’s weather demands.

Do weatherproof tent rentals require professional installation?

Professional installation is highly recommended for weatherproof tent rentals to ensure safety and proper setup. Experts are trained to securely anchor the tent, align modular components, and install features like gutters and sidewalls. Incorrect installation can compromise the tent’s weatherproofing, leading to potential issues during the event. Most trusted tent rental companies include installation services as part of their packages.

How do weatherproof tents protect against lightning during storms?

Weatherproof tents are not designed to provide lightning protection, as they are typically made from materials that do not conduct electricity. For events in areas prone to lightning, additional safety measures like avoiding tall poles or nearby trees are essential. Rental companies can help identify safer locations for the tent to minimize risks. Always have an evacuation plan in place for severe weather situations.

Can weatherproof tent rentals be used on all types of terrain?

Yes, weatherproof tent rentals are adaptable to various terrains, including grass, asphalt, and concrete. However, different terrains may require specific anchoring methods, such as stakes for soft ground or weighted anchors for hard surfaces. Rental providers often assess the event site in advance to determine the best setup options. 


Choose Reliable Tent Rentals by Durkin’s for Any Occasion!

Durkin’s has been a trusted provider of high-quality tent rentals in Connecticut, offering weatherproof solutions for events of all sizes. Whether planning a wedding, corporate gathering, or private celebration, Durkin’s combines durable materials, expert installation, and innovative designs to ensure a safe and stylish event. Our team delivers exceptional service tailored to meet the unique demands of outdoor events. 

Contact us today to explore our range of customizable, weather-resistant tent options and make your event unforgettable!

MackAdmin6 Weatherproof Features Trusted Tent Rentals Should Offer
read more

8 Crucial Tips When Choosing a Location for Your Custom Pergola Construction

No comments

Selecting the right location for your custom pergola is crucial to maximizing its functionality and enhancing the aesthetic appeal of your outdoor space. As pergolas in Connecticut become an increasingly popular addition to homes, understanding the nuances of custom pergola construction is essential. To get you started, we will explore eight tips for choosing the perfect spot for your pergola.

Tip 1: Consider the Purpose of Your Pergola

Selecting the ideal location for your custom pergola construction hinges significantly on its intended purpose. A pergola is a structural addition to your property and a lifestyle enhancement.

Aligning Pergola Function with Lifestyle Needs

  • Entertainment Hub: If your pergola is meant to serve as an entertainment space, consider a location that’s large enough to accommodate seating arrangements and allows for free movement. This area should be easily accessible from the house, making it convenient for hosting gatherings.
  • Dining Al Fresco: For those envisioning dinner under the stars, a pergola near the kitchen or with a built-in outdoor kitchen can make dining outdoors seamless. This proximity eases the transport of food and utensils and enhances the overall dining experience.
  • Garden Oasis: If the pergola is a tranquil retreat, nestled within the garden, select a spot surrounded by greenery, away from the noise of the street or household. This setting fosters a serene atmosphere where one can unwind or meditate.
  • Children’s Play Area: When intended as a play area, the pergola should be situated where it’s easy to monitor the children from the house. Safety is paramount, so consider soft landscaping around this area to cushion any falls.
  • Workout or Yoga Space: The location should promote calmness and concentration for those seeking a workout or yoga space. A secluded part of the garden with views of nature can be ideal, providing a peaceful environment for physical and mental health activities.


Tip 2: Analyze Sun Exposure and Shading Needs

Understanding sun exposure and shading needs is critical to custom pergola construction. The sunlight your pergola receives can dramatically affect its usability and comfort.

Assessing Sun Exposure

  • Daily Sun Path: Track the sun’s path across your property to determine how sunlight moves throughout the day. This knowledge will help you decide the best orientation for your pergola to maximize or minimize sun exposure.
  • Seasonal Changes: Sun exposure varies with the seasons. A location that receives ample sun in the summer may be quite shaded in the winter. Consider how the changing angle of the sun will affect the light and warmth your pergola receives throughout the year.
  • Natural Shading: Utilize existing natural elements, such as trees or tall structures, that can provide shade. The strategic placement of your pergola can harness these elements to create a comfortable space with natural cooling.
  • Purpose-related Exposure: If your pergola is for plants that require significant sunlight, placing it in a sunnier spot is essential. Conversely, a location with partial shade might be preferable if it’s for relaxation.
  • Time of Day Usage: Consider when you will use the pergola. If you plan to use it primarily in the evenings, western exposure will provide lovely sunset views, but if morning use is intended, eastern exposure will capture the sunrise.

Integrating Shading Solutions

  • Adjustable Coverings: Incorporate adjustable coverings in your custom pergola construction to control the amount of sunlight filtering through. This flexibility allows you to modify the exposure based on the time of day or weather conditions.
  • Permanent Roofing: For pergolas intended for all-weather use, consider a permanent roof that can provide consistent shade and protection from the elements. This option can be particularly useful in areas with intense sun exposure.
  • Vegetation and Climbers: Planting climbing vines or fast-growing shrubs around your pergola can offer natural shade and cooling and enhance its aesthetic appeal. These plants can also attract wildlife, adding an element of nature to your outdoor space.
  • Material Choices: The materials used in custom pergola construction can affect the shade provided. Denser materials or closer beam spacing will offer more shade, while lighter, more open designs will allow more sunlight.
  • Orientation and Layout: The orientation of the pergola’s slats or roof can be designed to cast shadow patterns, reducing direct sunlight while still allowing natural light. This consideration in the design phase can significantly impact the functional enjoyment of the space.


Tip 3: Evaluate the Terrain and Soil Condition

Evaluating the terrain and soil condition is critical in custom pergola construction. A pergola’s stability and longevity depend heavily on the ground upon which it rests. Understanding the intricacies of the terrain and soil can prevent future structural issues and ensure the pergola’s durability.

Soil Quality and Foundation

  • Soil Type Assessment: Different soil types have varying load-bearing capacities. Sandy, clay, or loamy soils each require specific foundation solutions to stabilize the pergola.
  • Foundation Depth: The depth of the foundation should be determined based on the soil analysis. Poor soil conditions may necessitate deeper foundations or special engineering considerations to ensure stability.
  • Root Interference: Be aware of underground roots from nearby trees that can interfere with the foundation. Root systems can also change the soil composition and moisture levels, affecting the pergola’s foundation.
  • Frost Heave Considerations: In regions like Connecticut, frost heave can be a concern. The foundation must be constructed below the frost line to prevent shifting and damage during freeze-thaw cycles.
  • Professional Soil Testing: Engaging experts like Durkin’s for soil testing can provide accurate information on the soil’s capacity to support your pergola. This step is crucial in custom pergola construction to ensure the longevity and safety of the structure.


Tip 4: Think About Privacy and View

Privacy and view are significant considerations in custom pergola construction. The location and design of your pergola can greatly influence how much you enjoy your outdoor space in Connecticut, affecting both the seclusion it offers and the vistas it frames.

Balancing Privacy with Aesthetics

  • Strategic Placement: Position your pergola to maximize privacy from neighbors or public spaces. This might mean situating it in a corner of your yard or using natural landforms as barriers.
  • Use of Landscaping: Incorporate landscaping elements like hedges, trees, or tall plants to create a natural screen around your pergola. These not only enhance privacy but also add to the space’s beauty and tranquility.
  • Orientation of Openings: Consider the direction of the pergola’s openings—align them to capture desirable views while blocking unsightly ones. This strategic orientation can significantly affect the enjoyment and functionality of the pergola.
  • Incorporating Privacy Screens: In custom pergola construction, integrating built-in screens or lattices can provide privacy without sacrificing light and airflow. These elements can be both functional and decorative, enhancing the overall design.
  • Elevation and Height: Sometimes, raising the height of the pergola or building on an elevated platform can offer privacy from certain angles while offering expansive views from above.


Tip 5: Proximity to Home and Other Structures

In custom pergola construction, the proximity of the pergola to your home and other structures is a critical consideration that affects not only the design and functionality of the pergola but also its integration into the overall landscape and architecture of your property.

Integrating with the Home

  • Architectural Harmony: The pergola should complement the architectural style of your home. Its design, materials, and colors need to harmonize with the existing structures to create a cohesive look.
  • Transition Spaces: Ideally, the pergola should act as a transitional space between indoors and out, extending the living area seamlessly. The location should facilitate easy access to and from the house, enhancing the flow between spaces.
  • Utility Connections: Consider the ease of connecting utilities such as electricity, water, and gas, especially if the pergola will feature outdoor kitchens, lighting, or heating. Closer proximity to the house can reduce the complexity and cost of these installations.
  • Visibility from Inside: The view of the pergola from inside the house should be aesthetically pleasing. It should add to the visual appeal of your home, becoming a focal point from key interior vantage points.
  • Shade and Weather Protection: The pergola’s location relative to the home should consider the impact on shading and weather protection, possibly providing relief from the sun or shelter from the rain for adjacent indoor and outdoor spaces.


Tip 6: Assess Accessibility and Convenience

Accessibility and convenience are paramount in custom pergola construction, influencing how frequently and comfortably the pergola is used. The ease with which you can access and utilize your outdoor structure can enhance the overall enjoyment and functionality of your outdoor living space.

Ensuring Easy Access

  • Pathways to the Pergola: Establish clear, safe pathways leading to the pergola. Whether it’s stepping stones, a paved walkway, or a landscaped path, the route should be easily navigable, well-lit, and free from obstructions.
  • Proximity to the House: The closer the pergola is to your home, the more accessible it will be, especially for quick outdoor escapes or when carrying items back and forth. However, it shouldn’t be so close as to disrupt the flow or aesthetic of your home’s design.
  • Entry and Exit Points: Consider multiple entry and exit points in the pergola’s design to enhance accessibility. This is particularly important for larger pergolas or those used for gatherings, ensuring guests can move freely without congestion.
  • Accessibility for All Ages and Abilities: Design the access to your pergola with inclusivity in mind, ensuring that it is usable for people of all ages and abilities. This may include ramp access for wheelchairs and strollers, and ample space for maneuvering.
  • Utility Access: For pergolas that incorporate lighting, heaters, or cooking appliances, ensure easy access to electrical and plumbing connections. This consideration in custom pergola construction enhances the usability of the space.


Tip 7: Check Local Building Codes and Regulations

Navigating local building codes and regulations is a critical component of custom pergola construction. Compliance with these rules ensures that your pergola project is legal, safe, and up to standard. Understanding the intricacies of these regulations can save you from future legal and structural headaches.

Understanding Building Codes

  • Permit Requirements: Determine whether your pergola project requires a building permit. This often depends on the structure’s size, height, and proximity to property lines. Securing the necessary permits before beginning construction is crucial to avoid penalties and forced modifications.
  • Zoning Laws: Familiarize yourself with local zoning laws, which dictate how land can be used in your area. These laws affect where you can place your pergola on your property and may limit its size and design.
  • Structural Standards: Building codes set standards for construction to ensure safety and durability. Your pergola design must adhere to these standards, including those related to materials, foundation depth, and load-bearing capacity.
  • Historic District Restrictions: If your property is in a historic district or governed by homeowners’ association (HOA) rules, additional restrictions may apply. These can affect the aesthetics, materials, and placement of your pergola.
  • Safety Regulations: Ensure your pergola design includes safety features, especially if it will be used in a commercial setting or will feature elements like fire pits or electrical installations.


Tip 8: Plan for Future Landscaping and Expansion

When embarking on custom pergola construction, it’s wise to consider not only the immediate needs but also future landscaping and potential expansion. This foresight can save you time, money, and effort in the long run, ensuring that your outdoor space can evolve with your changing needs and preferences.

Future-Proofing with Landscaping

  • Versatile Design: Choose a pergola design that can easily integrate with various landscaping themes. Whether you decide to change your garden’s style or plant new vegetation types, your pergola should remain a central, cohesive element.
  • Scalable Planting: Initially plant fast-growing, but easily manageable, vegetation around your pergola. This allows for quick coverage and privacy, with the flexibility to adjust, replace, or enhance the plantings as your garden matures.
  • Seasonal Considerations: Plan your landscaping with the changing seasons in mind. Ensure that the plants you select will not only survive but thrive throughout the year, complementing your pergola and providing a dynamic, evolving backdrop.
  • Irrigation Planning: Incorporate an adaptable irrigation system that can be expanded or modified as your garden grows. This will ensure that new plantings receive adequate water, and existing landscapes remain vibrant and healthy.
  • Lighting Flexibility: Install a lighting system that can be adjusted or expanded. As your garden and pergola usage evolve, so too will your lighting needs, from highlighting new features to enhancing safety and ambiance.

Considering Expansion Possibilities

  • Structural Allowances: Ensure that the initial custom pergola construction includes the potential for expansion. This could mean structuring it in a way that additional sections can be added without compromising the existing design or stability.
  • Utility Readiness: If there’s a chance you’ll want to add features like an outdoor kitchen, fireplace, or sound system, plan for the necessary utilities and wiring from the start. This forward-thinking approach minimizes disruptions and future construction costs.
  • Space Planning: Leave adequate space around your pergola for potential expansions or additions. Whether it’s extending the pergola itself or adding complementary structures like decks or patios, having the available space is key.
  • Regulatory Forethought: Be aware of how expansions might affect zoning or permit requirements. Future-proof your project by understanding these potential regulations and planning your site accordingly.
  • Design Cohesion: Any future expansions should seamlessly integrate with the current pergola design, maintaining a unified aesthetic. Consider the long-term visual and functional aspects of your outdoor space to ensure it remains attractive and practical.


Frequently Asked Questions | FAQs

How long does custom pergola construction typically take from start to finish?

The duration of custom pergola construction varies depending on the project’s complexity, size, materials used, and the contractor’s schedule. Generally, the process can take anywhere from a few weeks to several months. This timeline includes initial design consultations, obtaining permits, the actual construction, and any final adjustments or landscaping.

Can I attach a pergola to my house, or does it need to be freestanding?

Both options are viable in custom pergola construction. Attaching a pergola to your house can create a seamless extension of your living space, offering convenient access and a cohesive design. However, a freestanding pergola offers flexibility in placement and design, allowing it to become a focal point elsewhere in your garden or yard.

What are the best materials for building a pergola that will last?

Durability in custom pergola construction is often achieved through materials like pressure-treated wood, cedar, vinyl, aluminum, and steel. Each material has its advantages and considerations regarding aesthetics, maintenance, cost, and longevity. Wood offers a natural look but requires regular maintenance, while vinyl and aluminum provide durability with less upkeep.

How can I ensure my pergola is eco-friendly?

Opt for locally sourced, renewable, or recycled materials and consider the energy efficiency of any added features, such as lighting. Designing the pergola to support solar panels or green roofing can further increase its sustainability.

What are some innovative features I can integrate into my custom pergola design?

Innovative features in custom pergola construction can include built-in seating, adjustable roofing systems for controlling sunlight and shade, integrated lighting and heating for extended use in various weather conditions, and smart technology for automated control of lighting, sound, and climate. Incorporating planters or trellises for green walls and privacy screens can also enhance the pergola’s functionality and aesthetic appeal.


Transform Your Outdoor Space with Durkin’s

Ready to turn your outdoor area into a stunning, functional retreat? Durkin’s in Connecticut is your go-to expert for custom pergola construction. With years of experience and a commitment to quality, Durkin’s crafts pergolas that are not only beautiful but also tailored to your lifestyle and preferences. Don’t just dream about the perfect outdoor  space—make it a reality. Contact Durkin’s today and start the journey to transforming your outdoor living experience.


MackAdmin8 Crucial Tips When Choosing a Location for Your Custom Pergola Construction
read more

Planning Events? 5 Common Tent Rental Mistakes to Avoid

No comments

One of the most crucial elements of outdoor event planning is tent rental. Tents provide much-needed shelter from unexpected weather and can contribute significantly to the overall ambiance. However, mistakes in tent rental can lead to unnecessary costs, setup delays, or even uncomfortable conditions for guests.

Here are the five common tent rental mistakes to avoid when planning for an event in Connecticut. 

Why Tent Rental Matters for Your Event

Tent rental is essential for outdoor gatherings. As part of the expanding event rental market, tent rentals also reflect the increasing demand for flexible and stylish event solutions. In fact, the global party supply rental market is projected to grow at an annual rate of 11.4% from 2024 to 2030, highlighting the rising popularity of rentals for events of all kinds. 

A tent allows hosts to add unique decor, lighting, and climate control elements, customizing the space for weddings, corporate events, or family celebrations. With so many benefits, proper planning in tent rental can significantly impact the overall experience.

Key Benefits of Tent Rental

  • Weather Protection: Tents shield guests from sun, rain, and other unpredictable elements, ensuring comfort throughout the event.
  • Space Definition: A tent creates a designated area, helping to organize seating, dining, and entertainment zones.
  • Atmosphere Creation: The right tent rental allows for creative decor and lighting, enhancing the event’s ambiance.
  • Guest Comfort: With options for flooring, heating, and cooling, tents make it easy to accommodate guests in style, regardless of the season.

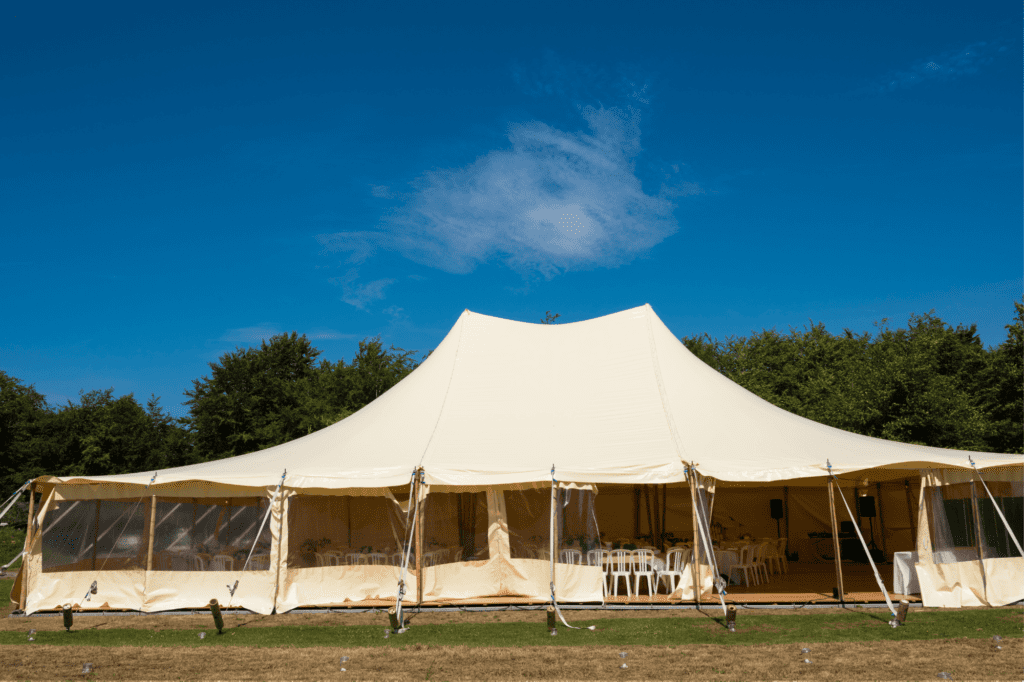
Stationary Frame Tents

5 Common Tent Rental Mistakes to Avoid

For event planners in Connecticut, it’s important to avoid common mistakes that can complicate event planning. Each of these errors can disrupt an otherwise smooth setup and can easily be prevented with a bit of foresight.

1. Choosing the First Tent Rental Company You Find

A frequent mistake in a tent rental is selecting the first company encountered. While it might seem convenient, jumping into a decision without comparison can lead to missed opportunities for better pricing or services. 

Every tent rental company has unique offerings, quality standards, and pricing structures, so it’s essential to shop around and compare. By dedicating some time to research, clients can feel confident they’re receiving the best value for their tent rental.

Tips for Avoiding This Mistake

  • Request Quotes: Get quotes from at least three tent rental companies to compare prices and options.
  • Assess Offerings: Check the range of tents and additional services (like lighting, flooring, and decor) each company provides.
  • Review Policies: Make sure to understand each company’s policies on setup, delivery, and cancellation.

2. Skipping a Site Visit Before Renting

Skipping a site visit is another common error that can lead to unexpected complications on the event day. While it may seem unnecessary, visiting the event location in advance allows the tent rental team to assess the space and prepare accordingly. Different sites come with unique challenges that may impact the setup and stability of a tent. 

By conducting a site visit, clients can identify and prepare for logistical issues, such as parking and equipment access, that may require adjustments in setup plans. 

Tips for Effective Site Visits

  • Assess Terrain: Check for flat, even ground to support stable tent installation. Uneven ground may require additional equipment for setup.
  • Identify Potential Obstacles: Overhanging branches, power lines, and other structures can affect where the tent can be safely placed.
  • Measure Space: Confirm that the chosen tent size fits comfortably within the available space. Make adjustments if nearby structures limit space.

3. Renting a Tent That’s Too Small for Your Guest List

Renting a tent that’s too small is a common issue that often leads to discomfort and crowding. Ensuring adequate space is vital for the comfort and safety of guests, particularly for events with seating, dining, and other activities. 

Most tent rental companies provide size guides or calculators to help determine the appropriate tent size. Consulting with a tent rental expert can help clients understand these sizing needs, preventing uncomfortable crowding or layout issues.

Guidelines for Choosing the Right Tent Size

  • Estimate Guest Count: Accurately count the number of attendees and allow extra space for last-minute additions.
  • Consider Event Type: A seated dinner requires more space than a cocktail-style event with standing guests.
  • Include Additional Elements: Account for space needed for tables, dance floors, catering stations, and other essentials.

4. Booking the Tent Too Close to the Event Date

Booking a tent rental too close to the event date is risky and can limit choices or increase costs. Many people overlook this detail, especially when juggling other event responsibilities. 

However, reserving a tent rental well in advance ensures a better selection of tents and accessories, as well as more time for customization. Securing a tent rental early also allows more time to plan and finalize other decor and logistical elements. 

Suggested Booking Timeline

  • 6-12 Months in Advance: For large-scale events or peak wedding season dates, start the tent rental search early to secure the best options.
  • 3-6 Months in Advance: Smaller events may not require as much lead time, but booking three to six months in advance still provides ample choice.
  • 1 Month or Less: Last-minute bookings often result in limited availability and higher prices. If unavoidable, work closely with the tent rental provider to explore available options.

5. Not Allowing Enough Time for Tent Setup and Decor

Tent setup is a critical step in the rental process, yet many hosts underestimate the time needed for proper installation. Setup involves not only erecting the tent but also testing its stability, installing any flooring, and arranging additional decor elements. 

Insufficient setup time can lead to rushed installations or incomplete decor, which can affect both safety and presentation. Coordinating a realistic setup timeline with the tent rental company and other vendors prevents last-minute issues and ensures the tent is ready when guests arrive.

Considerations for Setup Timing

  • Allow Buffer Time: Schedule setup several hours, or even a day, before the event start time to account for potential delays.
  • Coordinate with Vendors: Ensure that decorators, caterers, and entertainment providers can access the tent area after setup for their preparations.
  • Test All Installations: Confirm that lighting, flooring, heating/cooling units, and other accessories are securely installed and functioning as intended.

7 Must-Haves for Your Tent Rental Checklist

7 Must-Haves for Your Tent Rental Checklist

To simplify the tent rental process, using a checklist can ensure that nothing is overlooked. Here’s a recommended checklist for a smooth tent rental experience:

1. Set a Budget

Establishing a budget helps guide decisions on tent rental options, including additional features like flooring, lighting, and sidewalls. A budget allows event planners to balance quality with affordability and avoid overextending resources on the tent rental alone.

2. Choose the Right Tent Style for Your Event

Different tent styles, such as pole tents, frame tents, or clear-span tents, suit different types of events and layouts. Choose a tent style that aligns with the event’s aesthetic and functional needs, whether it’s an elegant wedding or a casual corporate event. Consulting with the rental company can help ensure the chosen tent style enhances the event experience.

3. Confirm Accessibility and Power Requirements

Verify that the event site has easy access to tent setup equipment and sufficient power sources if you plan to include lighting, climate control, or catering appliances. This is especially important for remote locations that may lack power infrastructure. Arranging for generators or extension cords can prevent power issues and ensure a smooth setup.

4. Have a Backup Plan

Outdoor events are inherently unpredictable, so having a backup plan is essential. This may involve reserving sidewalls for wind protection, additional tents for extra guests, or renting portable heating units for cooler temperatures. A contingency plan keeps the event flexible and adaptable to unexpected challenges, ensuring that guests remain comfortable.

5. Confirm Setup and Breakdown Timing

Coordinating the timing for both setup and breakdown is crucial to avoid delays on the event day. Confirm with the tent rental company how much time they need for setup and when they plan to arrive. Additionally, clarify the breakdown time to ensure it aligns with the event’s schedule and venue rules. 

6. Check for Necessary Permits

Some outdoor locations, especially public venues or parks, may require permits for tent setup. Verify with the venue if permits are needed and work with the tent rental company to obtain any necessary documentation. Ensuring all permits are in place can prevent last-minute disruptions or fines, helping the event proceed smoothly.

7. Plan for Lighting and Climate Control Needs

Consider whether additional lighting or climate control is needed for the tent rental, especially for evening events or during extreme weather. Adding string lights, chandeliers, portable heaters or fans can make the tent more comfortable and visually appealing. Discuss lighting and temperature control options with the rental company to enhance the ambiance and keep guests comfortable throughout the event.

How to Choose the Right Tent Rental Company

Choosing the right tent rental company is foundational to a successful event. The Knot, a leading wedding news and resource outlet, surveyed nearly 12,000 couples and found that 72% of weddings in 2022 took place either fully or partially outdoors. This growth in outdoor events also signals the importance of having a reliable tent rental to elevate the entire experience. 

Knowing this, finding a provider who understands the nuances of outdoor setups is essential. A reliable company will offer quality tents, timely service, and helpful advice on selecting the best options for the event’s needs. Below are key considerations when choosing a tent rental provider: 

1. Research Multiple Providers

Selecting a tent rental company requires research and comparison. It’s important to check various companies to find the best fit based on quality, reputation, and service. Start by browsing local companies online, visiting their websites, and reading customer reviews. Pay attention to any patterns in feedback, particularly regarding service quality and reliability. 

2. Ask for Recommendations

Recommendations from family, friends, or event planners can be invaluable. If they have had successful experiences with tent rental, their insights can help guide the decision. Recommendations also provide a personal touch, as they offer real insights into a company’s strengths and areas for improvement.

3. Check for Specialized Experience

Different events have different needs, and not every tent rental company specializes in all types of gatherings. Some companies focus on large weddings, while others are more suited to corporate events or private parties. Choosing a company that understands the requirements of the specific event type helps ensure smooth service. 

4. Evaluate Customer Service

The quality of a tent rental company’s customer service is critical to a positive experience. A professional company will communicate clearly, respond to questions promptly, and provide transparent information about pricing and services. Responsive and respectful communication can save time, reduce stress, and prevent misunderstandings. 

5. Inspect Tent Quality and Maintenance Standards

A reputable tent rental company should maintain high standards of quality and cleanliness for its inventory. It’s essential to confirm that the tents are regularly inspected, cleaned, and well-maintained, as this will impact the tent’s appearance and reliability. Ask the company about their maintenance practices, and if possible, request to see sample tents. 

6. Verify Insurance and Safety Compliance

Tent rental involves equipment that must be installed safely, so choosing a company with proper insurance and compliance with safety standards is crucial. Reputable companies will carry liability insurance and follow industry guidelines for setup and installation. Inquire about the company’s insurance coverage and safety procedures to ensure safety standards for both the hosts and guests. 

7. Consider Customization Options for Unique Events

Different events call for different tent styles and setups, so it’s beneficial to choose a tent rental company that offers customization options. Some companies provide additional features like customized lighting, sidewalls, or flooring options. Ask the company about available add-ons or customization packages, as these features can elevate the event and make it memorable for guests.

Frequently Asked Questions

What is the cost range for renting a tent?

Tent rental costs vary based on size, style, location, and any additional features such as flooring or lighting. Small, basic tents might start around $200, while larger, customized setups can exceed $5,000. It’s best to get quotes from multiple providers to find a price that fits your budget.

Do tent rental companies provide tables and chairs?

Many tent rental companies offer tables, chairs, and other event essentials, either as part of a package or as separate add-ons. This can be convenient for clients looking to bundle services under one provider. Be sure to confirm the availability and pricing of these items when making your tent rental reservation.

How are tent rentals secured on different surfaces?

Tents can be anchored using stakes when set up on grass or other soft ground, ensuring stability and security. On hard surfaces like concrete, weighted ballasts are typically used to keep the tent firmly in place. Discuss the setup location with the rental company so they bring the right equipment for secure installation.

Is a deposit required for tent rental reservations?

Most tent rental companies require a deposit to confirm and hold your booking, often ranging from 20-50% of the total cost. This deposit helps secure your chosen tent and event date. Make sure to review the company’s deposit and cancellation policies before finalizing your reservation.

Can tent rentals withstand strong winds and rain?

Many event tents are designed to handle moderate winds and rain, with some options built for more extreme weather. However, it’s essential to discuss weather-resistant features and policies with the rental company to understand any limitations. They may also have recommendations for additional measures, like sidewalls or extra weights, to enhance safety.

Ready to Secure the Perfect Tent Rental for Your Event? 

Make your next outdoor gathering in Connecticut unforgettable by choosing the right tent rental partner. Durkin’s, located conveniently in Connecticut, specializes in high-quality tent rentals that elevate any event, from weddings to corporate functions. With our extensive range of tent options and reliable service, Connecticut residents can count on a seamless setup tailored to their needs. Contact Durkin’s today to ensure your tent rental meets every expectation!

MackAdminPlanning Events? 5 Common Tent Rental Mistakes to Avoid
read more

11 Benefits of Adding Backyard Awnings to Your Patio

No comments

Adding backyard awnings is a fantastic way to enhance the usability and value of any patio or outdoor space. In fact, these functional structures provide more than just shade—they expand living spaces, improve energy efficiency, and elevate the aesthetic appeal of any home. 

Here are the top benefits of installing awnings in backyards and patios and insights into why they’re a valuable addition for homeowners.

MackAdmin11 Benefits of Adding Backyard Awnings to Your Patio
read more

6 Versatile Ways to Use Quality Outdoor Pergola Beyond Just Entertaining

No comments

An outdoor pergola is more than just a decorative backyard feature — it’s a versatile addition with functional uses beyond entertaining, like gardening, workspaces, poolside retreats, and relaxation areas. A study from the National Association of Realtors (NAR) shows that adding structures like decks or patios can yield up to 80% return on investment, with listings mentioning “pergola” selling 2% higher and 9 days faster.

Here are six unique and practical ways to use an outdoor pergola, showcasing how it can transform a backyard into a multipurpose haven that meets diverse lifestyle needs.

MackAdmin6 Versatile Ways to Use Quality Outdoor Pergola Beyond Just Entertaining
read more

6 Things You Didn’t Know About Tent Rentals for Large-Scale Events

No comments

Tent rentals, expanding rapidly with an impressive CAGR throughout the forecast period from 2023 to 2030, are a popular choice for large-scale events, such as weddings, corporate gatherings, and festivals, offering a versatile and practical solution for outdoor setups. While many people recognize the basic benefits of tent rentals, there are several lesser-known features and options that can significantly enhance the event experience. 

Here are six surprising facts about tent rentals, revealing how they can be tailored to meet the unique needs of any large event. 

MackAdmin6 Things You Didn’t Know About Tent Rentals for Large-Scale Events
read more

How to Maintain and Care for a Modern Pergola Year-Round

No comments

A modern pergola is an elegant and functional addition to any outdoor space, offering a perfect blend of aesthetics and practicality. Whether it serves as a shaded retreat from the summer heat, a frame for outdoor plants, or a focal point for outdoor entertaining, maintaining a modern pergola is essential to ensure its long-term beauty and durability.

MackAdminHow to Maintain and Care for a Modern Pergola Year-Round
read more